
How to Create Heart-Shaped Cat Eye Nails for Valentine’s Day
How to Create Heart Cat Eye Nails for Valentine’s Day
Valentine’s nail art season is here and if you want something romantic, this heart cat eye look is the one.
In this tutorial, Clare @nailedbyclare shows you how to create heart-shaped cat eye nails using a simple magnet technique, layered cat eye shades, and a touch of isolated chrome for a luxe finish your clients will love.
Watch Now
Products Used in This Valentine’s Cat Eye Nail Art
- Muse CatEye
- HONA CatEye Magnet
- Embers CatEye
- Dotting Tool
- Black Detail Paint
- Manhattan Chrome
- SuperShine Topcoat
More Valentines Inspo!
Transcript
Hi everyone. Welcome to my Valentine's Day tutorial. I will be showing you how to make these amazing hearts using the paperclip method, which I know a lot of people struggle with. First up, we're gonna prepare the paperclip for the magnet, which you'll do by first straightening it out, bending it in the middle, then twist the ends into a V shape, and then bend the other end slightly more than 90 degrees.
Note how it's slightly curved downwards. And this is what we're gonna use for the hearts. First product I'm going to use is this muse cat eye.
Use the other end of the magnet to activate the particles. , Make sure you bring them all to the surface like this. And then we're gonna use the paperclip in the middle of the nail. You want to make sure it's as close as you can without touching. And also the end of the magnet should be slightly below the nail.
We're gonna repeat this step on every nail. Make sure you flash cure each nail [00:01:00] individually before you move on to the next one. It takes a few seconds for the heart to appear the way you want it, so just hold it there and try different angles and see what works best. If you mess it up, you can just repaint the cat eye and try.
After the last one, do a full cure and this is what you end up with. For the next step, we're gonna use embers CatEye use a dotting tool to make two dots in the center of the hearts and then align a brush to draw out the heart shape.
We're then gonna use the magnet again and activate the cat eye.
Do another full cure when you've done the last one, and this is what they'll look like when you finish this step. The next part is isolated chrome, so we're gonna wipe the nail with IPA, [00:02:00] then use a buffer to completely buff over all the nails, leaving no shiny bit. After giving them a dust, we're ready to go in with our detail paint.
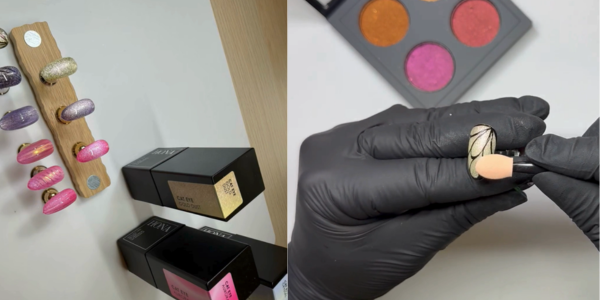
I use black for literally everything I say to Chrome. Use a thin liner brush and coat it in the black detail paint, making sure there's not too much product on it, and carefully paint these thin lines on each side of the heart. You don't need to worry about doing one at a time for this. So once you've done all the nails, pop that in for a full cure.
For the chrome, I'm using Manhattan, which is a lovely champagne gold. Use an applicator to put it on all the black parts you've just painted. You don't need to use much of this at all. As a little goes a very long way. Give them a quick dust to get rid of all the loose bits of Chrome. And now we're ready for top coat.
And this is the final result. I hope you enjoyed watching this, and hopefully this video will help you achieve this. Look yourself. Thank you. Bye.
