
Sugared Snowflakes
For the 6th day of our 12 days of HONA countdown, we’re learning this stunning sugared snowflake design with @mad.house.nails using our new advent-calendar-exclusive shade, Cloud Nine Gel Polish. Don't worry If you haven't got the advent calendar, you can still follow along with your closest glitters and gel polish.
Watch the Video Tutorial
Application Guide
Video Transcript
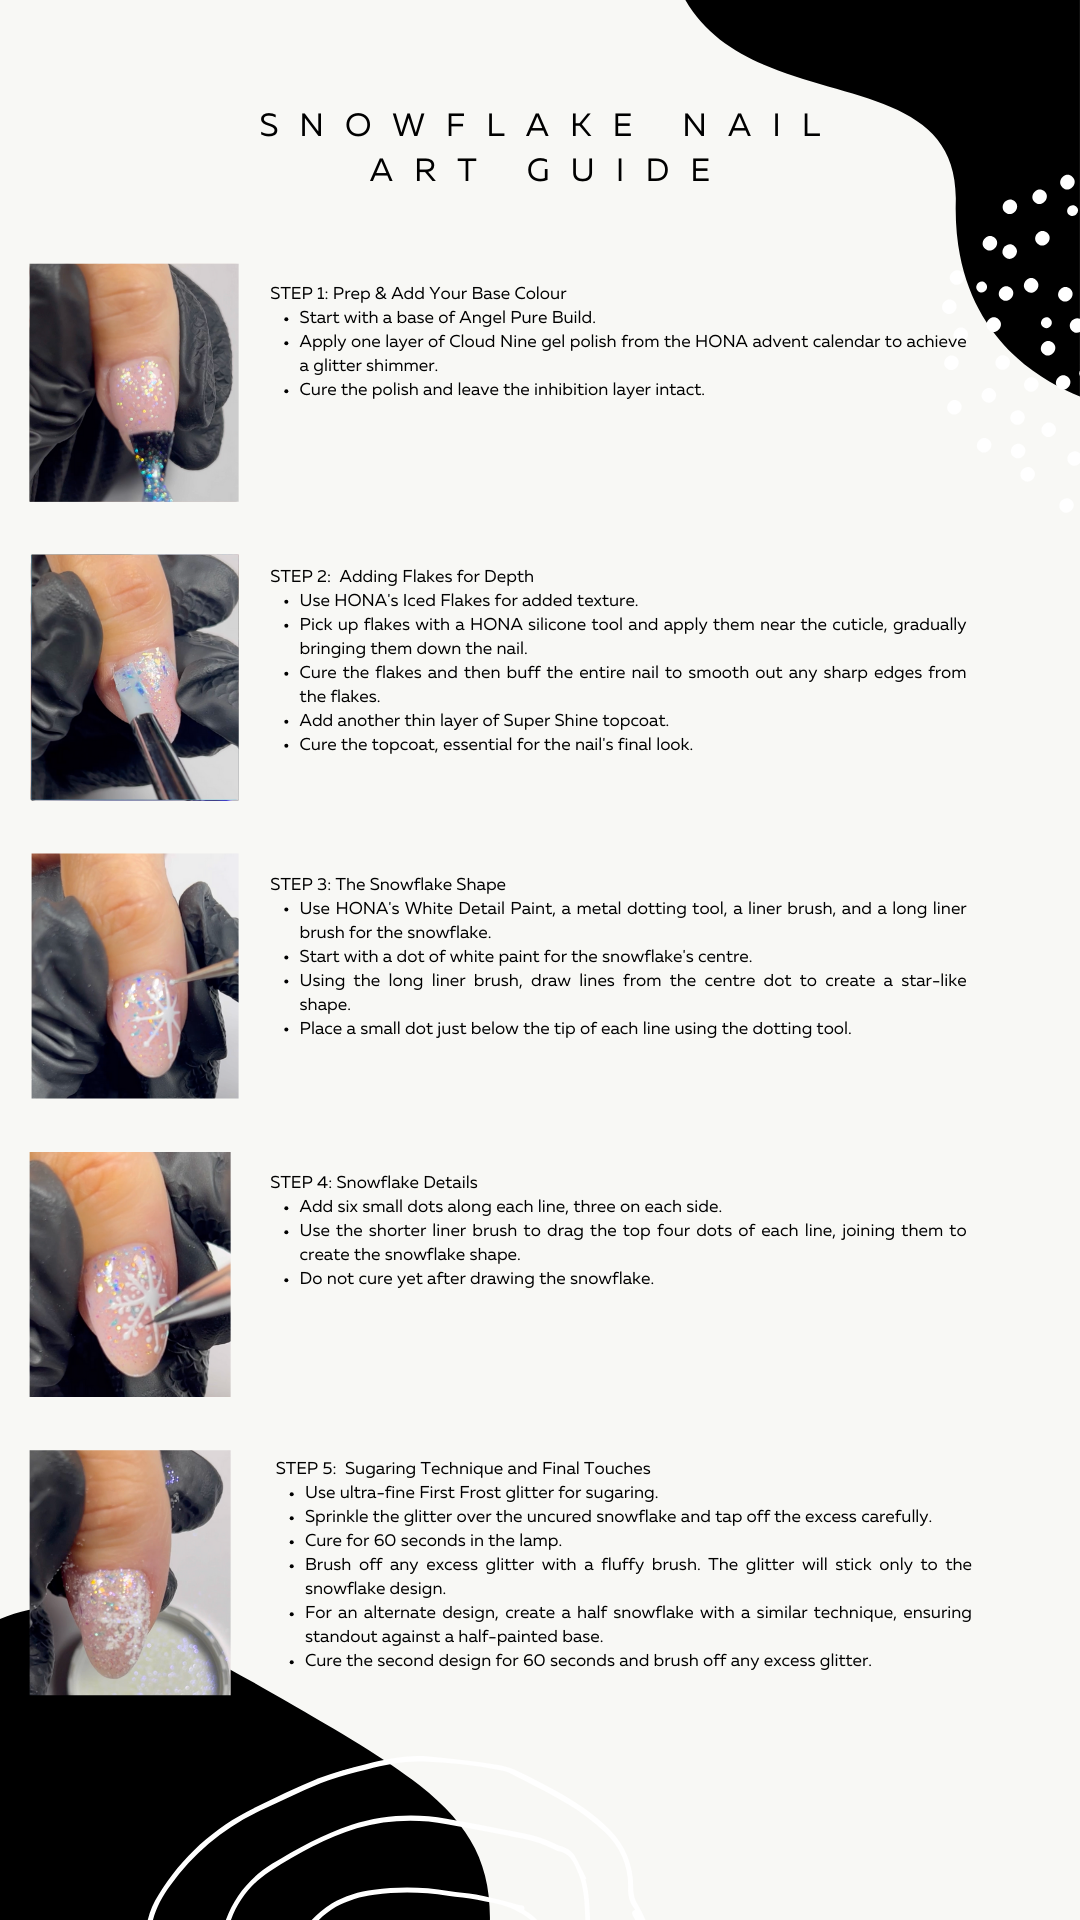
Hey guys, we're Ciara and Roma and today we're going to show you a sugared snowflake tutorial using a new gel polish as our base from the HONA advent calendar. Cloud Nine is a beautiful frosty glitter polish that makes the perfect base for a Christmas nail set. We have started with a base of Angel PureBuild and are going and with one layer of cloud nine to give it that gorgeous glitter shimmer. Cure this and don't wipe the inhibition layer this is important. Next we are going to use our flakes to add a bit of depth to the frosty look. Here we're using iced flakes and our HONA silicone tool to pick some of the flakes up with a silicone tool and we're going to apply these by the cuticle and randomly bring them down nail. Once it's cured we're going to go on with a buffing block and give the whole nail a buff. This will get rid of any sharp edges sticking up from the flakes to leave the nail fully smooth. Next we add another thin layer of SuperShine topcoat and cure. This is important for the final look of the nail. Now we're ready to start creating our snowflakes. For this we're going to be using HONA's white detail paint the metal dotting tool the liner brush and our long liner brush. We start by placing a dot of white on the nail wherever you want the centre of our snowflake to be using the long liner brush drag out from the centre dot almost creating the shape of a star at the end of each line place a small dot just below the point using our dotting tool. Working down each line place six small dots three on either side over the whole snowflake. Then using our shorter liner brush drag the top four dots of each line joining them to the line and the centre of them to give the shape of our snowflake. Once this is done, it's important not to cure this just yet. We are not going to sugar our snowflake using an ultra fine first frost glitter. Using the tools you pick up the glitter, sprinkle it over the uncured snowflake and tap off the excess whilst being careful not to hit your hard work. Once the excess glitter is off, give us a full 60 second cure in the lamp. Going in with our fluffy brush we're now going to brush off any excess glitter. This sugaring technique on the non white top coat will ensure that glitter will only stick to the snowflake design we have created. Another quick snowflake design you can create is this half snowflake which is really pretty against a half painted base to stand out. Place a dot in the middle of the centre line and then place two smaller dots above blue and to the side of the centre dot place one single dot in each corner to create a kind of square using our longliner brush drag out from the centre along each dot to create our snowflake shape going in with the glitter again we're going to repeat the sugaring technique. Give it a full 60 second cure and brush off any excess glitter and that is the look finished. You can do so much with snowflakes as every one is unique. So have some fun with that and get creating. Thank you for watching our tutorial.

